However, many of its customizations aren’t available in the app’s settings panel. You have to set up these hidden preferences through the Terminal. You can find the relevant instructions in MailMate’s user manual. Today, I want to share three useful hidden preferences in MailMate that make it more convenient and better suited to my needs.
1. Set a “Delayed Sending Time”
The first one is setting a default delayed sending time. As the name suggests, this lets you specify a delay before emails are actually sent.
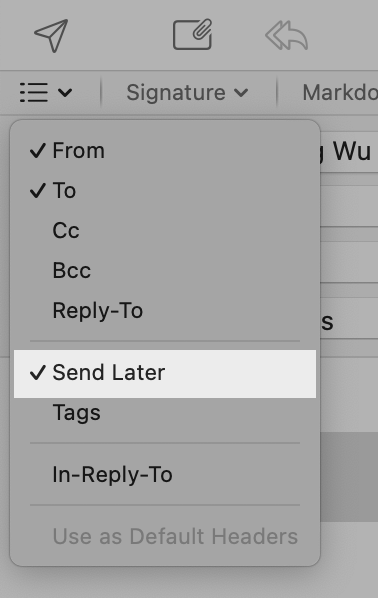
MailMate does have a built-in “Send Later” option in the composer. There’s a list icon (with a “⌄” symbol) in the upper-left corner of the window, below the paper plane icon (the “Send Message” button). “Send Later” is in the dropdown menu.
▲ MailMate does have a built-in “Send Later” option in the composer.
But this is a one-time setting—it only applies to that specific message. I want to show you how to set up a default Send Later time. This setting effectively combines the benefits of both Undo Send and scheduled sending.
To enable it and set the default delay, run the following command in Terminal:
(If you don’t include a time unit, seconds will be used by default.)
Please note: you must relaunch MailMate after running these defaults commands for the changes to take effect. After relaunching, you’ll see a new header in the composer named “Send Later,” and the time you set will appear there every time you compose a new message or reply.
After hitting the send button, the message will be temporarily placed in a mailbox named “Outbound.” Before the timer runs out, you can still edit or cancel the email.
Scheduled Sending
With this new “Send Later” header, you can also schedule messages using natural language. For example, if you want to send an email at 10 am tomorrow, type “10 am tomorrow” in the “Send Later” field. And if you’re not sure whether your input is valid, the manual explains:
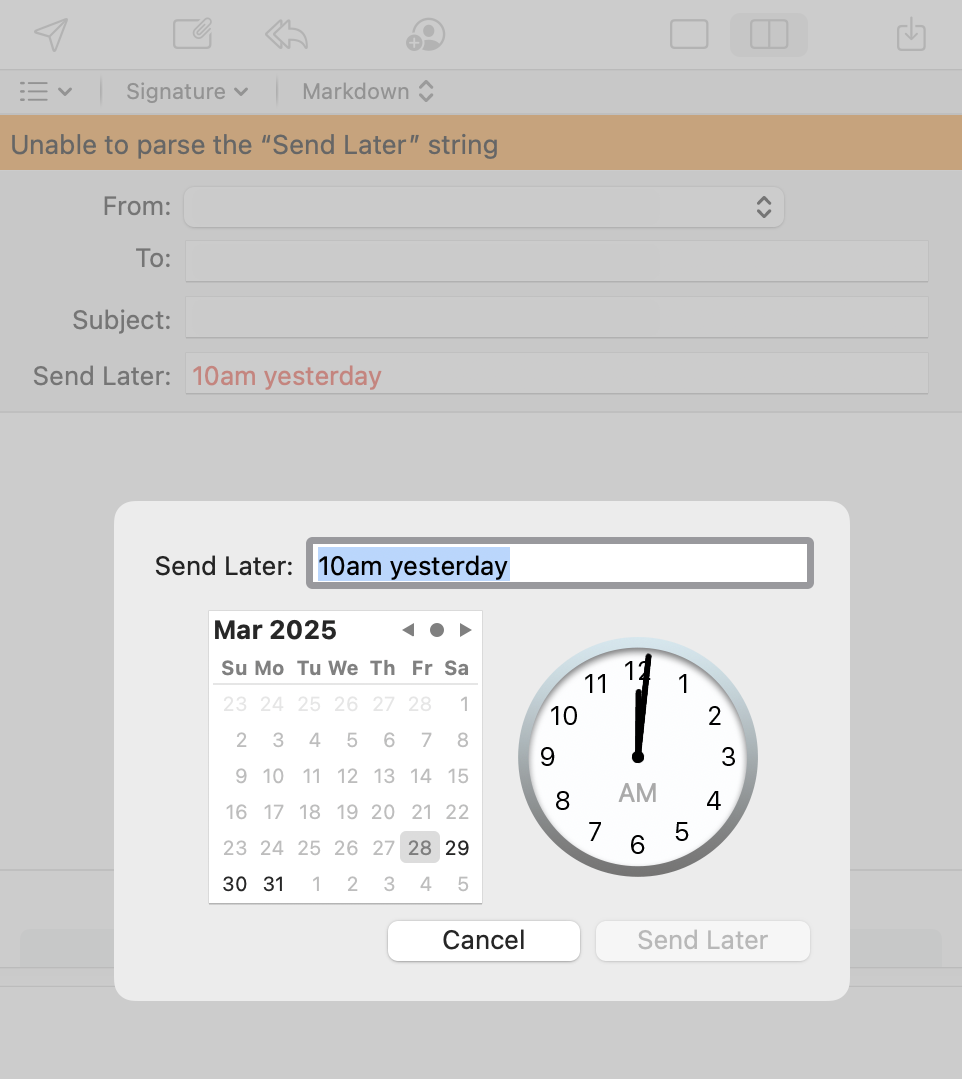
If MailMate cannot parse the expression and the user tries to send the message, then a sheet is shown which allows the user to correct the problem or set an exact time using a calendar and a clock.
As shown in the screenshot below, if you see the text in the “Send Later” field turn red, it means that MailMate can’t parse the expression. Then, after you hit the send button, a reminder with an orange background will appear, along with a sheet containing a calendar and a clock that let you correct the “Send Later” time.
▲ If MailMate is unable to parse your expression, a reminder and a sheet will appear, allowing you to correct the “Send Later” field.
One limitation of this feature is that MailMate must be open and your Mac must be connected to the internet when the message is scheduled to send.
Since this changes the default sending behavior, MailMate will display a warning about pending delayed messages when you quit the app. You can also disable or modify this warning if needed.
2. Change the Focus in the Composer
If, like me, you prefer to always have the focus in the text editor when opening a composer window, you can use this command:
I find this setting useful because it lets you start writing the email as soon as the composer window opens. There’s also a nice side effect: since the focus is in the text editor and not the “To” field, you haven’t filled in the recipient’s address. This significantly lowers the chance of accidentally sending the email. (Well, if your cat somehow hits the keys in a perfect sequence, an accident could still happen.) However, this “nice side effect” doesn’t work when replying to a message, so be careful.
3. Enable Auto-Expanding Email Threads
I prefer viewing emails in thread mode, and I like MailMate to automatically expand all threads at all times. You can enable this with:
Bonus: Turn on Automatic Message Selection After Switching Mailbox
When Benny Kjær Nielsen, the developer of MailMate, introduced this setting in revision 6216 (BETA) on January 26, 2025, he mentioned it as an experimental feature:
Changed: Automatic message selection (after switching mailbox) can now be enabled (MmAutomaticMessageSelectionEnabled). Consider it experimental for now.
Although it’s experimental, I’ve found it useful. I use the “Correspondence” layout, and with this enabled, MailMate automatically displays the last message (because it’s selected) after I switch mailboxes—saving me the extra step of pressing Tab.
defaults write com.freron.MailMate MmAutomaticMessageSelectionEnabled -bool NO
I think MailMate has so many “hidden preferences” because it’s hard to fit them all into the settings panel. And, according to Benny, most of them are experimental:
Some have just not been added to a Preferences pane yet, but most of them are used to enable experimental features which cannot yet be considered stable or complete features.
However, in my experience, the first three “hidden preferences” I introduced have been stable for the past two and a half years.
If you’re a MailMate user and haven’t explored these hidden preferences yet, I encourage you to check out the MailMate user manual. There’s a lot of useful information there, and I’m sure you’ll find something that fits your workflow.
Even if you’re not comfortable applying the settings yourself, you can export the manual pages as PDFs and upload them to an LLM chatbot like ChatGPT or Claude. Then, you can ask it to help you identify features that might be useful for you and how to enable them.
I plan to share more of my settings and tips on using MailMate in the future. I’d love to hear what features you enjoy most, or any handy settings you’d recommend.
I appreciate this video. Both Adam and Norm share their genuine opinions based on over a year of experience with the Vision Pro. (Btw, I’m a fan of Adam and his crew!)
Norm clearly enjoys using the Vision Pro, but what I find most interesting is how he feels after taking it off. At the end of the video, he says:
I might not be using it every day. I’m certainly using it at least once a week, but every time I put it on, it’s like, “Wow, I forget how nice it is in here.” At the same time, every time I take it off, I’m like, “Oh, the real world’s pretty nice too.”
“Oh, the real world’s pretty nice too.” reminds me of something Jaron Lanier wrote in his essay “Where Will Virtual Reality Take Us?” for The New Yorker last year:
In the nineteen-eighties, we used to try to sneak flowers or pretty crystals in front of people before they would take off their headsets; it was a great joy to see their expressions as they experienced awe. In a sense, this was like the awe someone might experience when appreciating a flower while on a psychedelic drug. But it was actually the opposite of that. They were perceiving the authentic ecstasy of the ordinary, anew.
I like watching videos about people working, especially when they articulate their thoughts through monologues or provide commentary.
About one year ago, during a certain period, I frequently watched YouTube videos about cameras and photography. One day, I watched a video from The Verge about the Hasselblad 907X & CFV 100C. After that, I ended up watching a few more videos about the camera. One of them was made by Willem Verbeeck.
Willem Verbeeck is a Belgian film photographer and YouTuber based in Los Angeles. Yes, he is a film photographer and made a video about the digital Hasselblad camera. But soon, my focus shifted from Verbeeck talking about the camera to how he was using it, and then my thoughts were all about his projects. At that point, I no longer wanted to watch more videos about Hasselblad.
In the video, Verbeeck said he wanted to use the Hasselblad for a project about the freeway landscapes in Los Angeles. The next scene shows him driving to a spot. That is a slope with a distant view of the freeway. “It’s 5 a.m. here in Los Angeles. It’s a really cold, windy morning. And I’m back at the spot I’ve photographed…” As Verbeeck says this, he sets up the tripod and gets ready to shoot. After a few shots, when I still thought about the photo he just made, he moved to the next spot.
On the second day, he did the same thing again. He left home by car at about 4:30 a.m. to a spot he wanted to shoot before sunrise. I’ve seen the sky before sunrise many times. It’s beautiful. Then I realized this is not about a YouTuber or working as a freelance film photographer (although I believe many jobs require you to get up early). It’s about the way he lives. He wants to shoot some photos, so he just drives out at midnight or early in the morning. Free and simple.
At that moment, the words “I envy this YouTuber” surfaced in my mind. I know it’s not an easy life. (I guess there is no such thing as “an easy life.”) What I envy is his mindset and lifestyle. It’s like: I want to do something and can do it right away. Of course, I can get up at 4:30 a.m. and go out for a jog or a walk, but driving my car to some spots to get a good photo shot for several consecutive days is a different thing.
The Morro Rock
Putting my envy aside, I really appreciate his projects and related videos. There are two other fascinating projects I want to talk about in this post.
The first project is about a massive rock. It’s the “Morro Rock,” a giant volcanic plug in Morro Bay, California. Before the project, Verbeeck went to Morro Bay once to shoot some photos. One day, while reviewing those images and prints, he noticed a theme that many of them have the Morro Rock in them. In some photos, the rock is the main subject; in others, in Verbeeck’s words, “it’s lurking in the background.” He then came up with an idea: how about making a project about it?
Compared to one-time photography—whether professional or tourist–style—continuously and repeatedly photographing the same subject, or even the same object, over a long period is not only more challenging but also a constraint that hones and stimulates creativity. Verbeeck said the following in a video titled “The Importance of Long Term Photography Projects,” where he reflected on the project called “The Morro.”
Instead of constantly trying to turn new corners now to look for the next best Landmark that I hadn’t gotten a picture of yet, I find it just as exciting, if not more, to go back to the same place that I’ve photographed a 100 times and just see how it looks different this time around.
This reminds me of what Dimitri Bruni and Manuel Krebs, the Swiss graphic designer duo, said in the documentary “Helvetica”:1
Dimitri Bruni: “We like restrictions. We can’t operate, we can do nothing without restrictions. The more restrictions we have, the more happy we are.”
[…]
Manuel Krebs: “When it comes to type, we will only use, if possible, one typeface, or two, and if possible we will use one size.”
They feel excited and happy when they face challenges and constraints.
Verbeeck’s work is impressive. I particularly like a few of the photos. For example, one shows a storefront full of hand-painted signs, which nicely reflects Morro Rock.
Another good one is a series of photos, or I can call it a sequence of time shifts. Those were taken in the morning as sunlight and shadows swiftly moved across Morro Rock. Verbeeck captured this fleeting transformation in four photos, showing the rapid shift in light over a brief moment—almost like a time-lapse of the moon’s phases. You can see the “dark side” of Morro Rock gradually fading until the entire surface is bathed in golden light. It’s fascinating.
I also like an image of two people playing basketball on the court while the massive Morro Rock fades into the misty background. When Verbeeck pressed the shutter, one player released the ball while the other took a shot. In reality, the mist was constantly shifting, and in the next second, both balls would fall. Rather than simply capturing that fleeting moment, Verbeeck’s camera seems to freeze time itself.
Of course, Verbeeck shows many other good photos in the videos. But I have to stop right here and leave the rest to tempt you into watching the video.
I like how Verbeeck sets up a project in the video. As a former student of a specialized art program in middle school, I find it similar to sketching and painting the same objects over and over—sometimes hundreds of times. It’s a good way to hone my skills and push myself to explore different angles and expressions. I can also apply the concept to a personal photography project, perhaps in a place where I live or one I visit frequently.
Verbeeck has visited Morro Bay about 20 times. Recently, he finished the last shot of the project and made a video about it. I recommend you watch all three videos. You may come up with some ideas to start your own projects. I’m looking forward to seeing the results if he puts them in a photobook.
The Purple Glow at the Night
The other project is about streetlights. The story is that one day Verbeeck learned that in Los Angeles, due to some kind of coating problem, a few LED streetlights started emitting a purple glow. Again, he drives out at night to find the purple streetlights to shoot and make it a personal project. People tipped him where to find those purple streetlights through Instagram DMs, and he marked them on Google Maps. “It’s like a treasure hunt,” Verbeeck said.
When I saw the purple streetlights in the video, I kept thinking about a scene in the Pokémon Go app or its predecessor, Ingress.2 Because the location with the purple streetlight is like indicating there is a “Gym” or a “Portal.” And it’s not on your smartphone screen; it’s in real life. Isn’t that cool?
Although I love shooting photos in bright sunlight, night photography has its own unique charm. From time to time, I take more good photos at night than during the day. And since night photography usually involves long exposures (in Verbeeck’s case, he’s doing film photography), what we see and what the camera captures can sometimes be drastically different. This visual dissonance—or even conflict—can be intriguing.
The other reason I like this project is that it’s fun, and its theme comes from unexpected events in everyday life. “There was a time when, every evening, the neighborhood would be shrouded in a purple glow.” I don’t know if any local residents will recall their childhood this way, but I hope they can use Verbeeck’s video as proof when sharing this strange memory with friends.
Verbeeck’s YouTube videos cover various photography-related topics in multiple formats. While some may not be as popular or entertaining, they are genuine. I truly enjoy watching his passion for photography unfold. I think you will find some of them truly inspiring and beautiful.
Thanks to Verbeeck, I’m planning to write a post about a photobook I discovered through another one of his videos, “A Tour of My Photobook Shelf.” I’m so glad I had a chance to read a photobook like that. Feel free to take a guess at which one it might be.
I came across this post through a toot from Jeff Johnson. If you’re like me and always looking for ways to operate your Mac more easily and efficiently, be sure to check it out.
Here are five useful tips I selected, arranged in the order they appear in the post:
Press ⇧⌘/ to search all of the current app’s menu items. Then use the Up/Down arrow keys to navigate the results and press Return to execute the selected menu bar action.
Press ⌃⌘D while holding the pointer over a word to view an inline dictionary definition.
After pressing ⇧⌘4, press the Space bar to select a window to screenshot. Hold down Option while taking the screenshot to remove the window’s shadow.
Press ⌥⌘C to copy the full pathname of the currently selected file.
Press ⇧⌘A to select the output from the previous command.
I use the first keyboard shortcut most often—it’s so convenient for searching and executing commands. It works best for native apps. Alternatively, you can use this Alfred workflow, “Menu Bar Search.” (I wrote a paragraph about this workflow in this post in Traditional Chinese.)
The second and third tips are already well known. I can add something to the second one: you can choose dictionaries and arrange their order in the built-in Dictionary app’s settings.
The fourth tip is for Finder. It’s better than right-clicking the file, holding Option, and selecting “Copy [File] as Pathname” in the context menu. However, it’s quite annoying that macOS Sequoia now encloses the copied pathname in single quotes. I even made a Shortcut to clean it up. If you know a better way to get a “clean pathname,” please let me know!
Finally, the fifth tip is for the built-in Terminal, and it’s what I miss most when using Ghostty. Another terminal emulator, Warp, also provides this handy feature, but even better–it lets me copy the command, the output, or both using different keyboard shortcuts.
The original post contains many other useful tips and tricks. Although it’s an update for macOS 14 Sonoma, it’s still worth your time.
They used to be great at progressive disclosure. You don’t eliminate complexity, you just hide it from new users, progressively disclosing the complexity as users become more experienced and knowledgeable.
I’ve been using Alfred on my Mac since 2013. Over time, I’ve found myself increasingly relying on it to initiate various tasks—searching the file system or the web, opening files, adding reminders, or interacting with AI—to the point where it’s no longer just an app launcher or a Spotlight-like tool. These days, I typically use Alfred 40-50 times a day, which has led to an unintended side effect: I now use the keyboard more than ever on my Mac. As a result, I’ve grown to prefer using the keyboard over the mouse and the trackpad.
At first, I appreciated this shift—until it started to feel like a burden.
Using the keyboard means that I don’t need to move my hand to reach the pointing devices. However, I found that the more I use the keyboard instead of the mouse or trackpad, the more commands and keyboard shortcuts I have to remember. I thought that eventually I would get used to it and remember all the commands and their key combinations I needed if I used them often enough. But in recent years, I’ve realized that I just can’t keep up, because:
The most often used keyboard shortcuts do become my muscle memory, but those I use less frequently don’t. And they might still be essential.
As I continue to integrate new software into my workflow, I’m always forced to remember new keyboard shortcuts.
I can’t help but wonder if the advantages of almost exclusively using the keyboard are really that compelling.
Using a mouse may not be the fastest or most efficient way to interact with a computer, but it’s certainly the easiest. We all know the benefits of GUI. When most of us need to click a button or an option, we simply glance at it or roughly recall its location, move the cursor, click it, and it’s done. We don’t have to put the cursor on the center of the button precisely. Any part—even just a few pixels—of the button is good to go. In contrast, if we want to use a keyboard shortcut to do the same task, we have to remember it and the keystrokes must be 100 percent right, sometimes even the order of the keystrokes matters.
Back to my case. When I try to memorize some new keyboard shortcuts, I feel like I’m learning a bunch of new vocabulary. Just like how the verb “paste” changes with tenses, the command “Paste” has several slightly different options: Paste, Paste and Match Style, Paste in Plain Text, etc. Each one of them has its own unique shortcut, which means I have to remember all of them if I want to paste something properly. But using a mouse or a trackpad is different. There is almost no memory involved, and it’s easier.
In my experience, clicking Edit on the menu bar to find the Paste and Match Style option is much easier than remembering the key combinations. It’s like looking up a word in a dictionary vs. trying to memorize a word and all its variations. (If you’re like me and find vocabulary learning challenging, this can feel like a mental overload.)
After I realized it, I’m not as obsessed with using keyboard shortcuts as I used to be. I think perhaps there is a balance between using keyboards and pointing devices.
But what if I still want to shift the balance slightly in favor of the keyboard? What can I do about it? Let’s save this topic for a future article.
iA Writer 其實我已經使用十幾年了,這次會特別提出來,是因為開發團隊因應 AI 趨勢,在 2023 年加入「Authorship」功能,讓使用者可以建立多個作者身分,區分文字是自己寫的、別人寫的,還是由 AI 產生的。
舉例來說,如果我把一段從 ChatGPT 複製而來的文字貼進 iA Writer,可以使用「Paste As > ChatGPT」,這樣 iA Writer 就會知道這段文字是「誰」寫的。又或者我把自己在 iA Writer 寫的一段文字複製到 ChatGPT 讓它改寫,然後再把這段改寫過的文字貼回 iA Writer、覆蓋原本的內容,此時選擇「Paste Edits From > ChatGPT」,告訴 iA Writer 這段文字是 ChatGPT 寫的,iA Writer 完成貼上後就會把「被改寫過的部分」變成淺色顯示,原本屬於我寫的、沒有被更改過的文字將會被保留,以一般的深色呈現。
Authorship 功能並不像追蹤修訂那麼強大,卻也已足夠讓在意「內容是誰寫的」這件事的使用者有個方便區分的工具。Authorship 也是 iA 公司對 AI 議題的回應,他們對新功能的定位如下:
This allows you to separate and control what you borrow and what you type. By splitting what you type and what you pasted, you can make sure that you speak your mind with your voice, rhythm and tone.
以今日大部分消費者的 email 使用模式來說,應該不太需要煩惱垃圾郵件問題。不過既然我想要多掌握一點自己使用 email 的自由(其中一部分就是逃離 Gmail,以後有機會再談),就會想試試看也是我聽聞已久、由 Michael Tsai 開發的垃圾信過濾軟體 SpamSieve。
SpamSieve 是一個結合電子郵件語料庫(corpus)、黑/白名單、通訊錄,以及貝氏分類器(以貝氏統計為核心的分類技術)等各種方法來防堵垃圾郵件的單機版軟體,透過手動和自動化訓練,去學習使用者的偏好。SpamSieve 可以跟包括 Apple Mail 在內的許多 email 軟體搭配使用,所有的分析、訓練與過濾都發生在我的 Mac,也只會留在我的 Mac。
Alfred 5.5 新增了許多 Workflow UI 元件,為 Workflow 顯示結果的排版(格狀顯示)和內容(文字、圖片、PDF 等)增加許多可能性,例如在 Alfred 與 ChatGPT 對話(需要使用 API)、顯示最近的螢幕截圖,或者直接打開 Alfred 寫筆記等等,現在都有相對應的 Workflow 可以下載來使用,對於想要自製 Workflow 的使用者來說當然也是好消息。(我知道最近兩三年最紅的 launcher 是 Raycast,不過我就是沒打算要跳過去 : p)
以下是幾個我常用的 Workflow:
Menu Bar Search,可以搜尋當前 app 的功能表,並且執行。我自己有在 macOS 設定快速鍵叫出 menu 上的「Help」,這樣也可以開始打字、搜尋,以步驟來說跟 Menu Search 一樣都是:1. 快速鍵 2. 開始打字搜尋,但 Menu Bar Search 比 Help 選單更方便的它有 Alfred 內建的「記憶功能」,所以更容易找出你常用的功能和快速鍵,而 Help 選單的搜尋結果排序是固定的,更不用說有些 Mac app 連「Help」選單都沒有。
Pandoc 的開發者是 UC Berkeley 的哲學教授 John MacFarlane。我想 Pandoc 的用途對每個人來說都略有不同,我最主要是用它把 Bike 檔案從 HTML 轉換成一個新的 Markdown 檔案,搭配前面提到的 Hazel,我就可以在 iPhone 或 iPad 用 iA Writer 查看我的 Bike 文件,過程完全自動化 : D 我還記得當初看到 Pandoc 的文件簡直目瞪口呆:它竟然可以轉換這麼多種格式!實在是很厲害。
另外還有幾個不錯的更新,例如提供更多字體大小的選擇,以及為 Things for Mac 增加推播通知功能,以往在 Mac 上你要收到待辦事項設定的時間通知,Things app 必須是開啟的(在 iOS/iPadOS 則不必),現在 Things for Mac 如果沒打開也照樣收得到通知了。另一個我個人很喜歡的更新是它也支援 Bike Outliner ✌🏻我可以在使用 Things Quick Entry 時直接帶入 Bike 大綱的資訊。
另一個重大改變當然是介面設計和功能上的調整,雖然在剛改版時有遇到一些狀況,例如串流功能被捨棄引發一部分使用者不滿,而且顯然影響到了 Overcast 在 App Store 的評價,因此 Marco Arment 後來有把經過調整後的串流功能加回來。幾個月過去,現在 Overcast 幾經更新之後,不管是在體驗上,或是呈現 show notes、章節資訊和播放控制等等,都變得比新版剛推出時更好。
不知道是湊巧還是大家對於過度後製的照片都覺得受夠了,在 Zerocam 推出後兩個月,Halide 也推出了名為 Process Zero 的新功能,也是拍攝一張 RAW 之後跳過各種內建相機會做的各種處理(例如 HDR、合併多張照片等等),儘管雜點也會跟著被保留下來,但整體質感仍勝過被過度處理的照片。我非常喜歡這個改變,因為 iPhone 14 Pro 以後的相機在處理照片上真的太過激進了。
不過 Halide 的開發者 Ben Sandofsky 也說,他們自己也經常在系統後製跟 Process Zero 來回切換,因為用手機拍照還是很仰賴光線條件,若要在手機上做夜間攝影,演算法和各種 computational photography 技術依舊有他們的優勢。
我在介紹這幾個 app 時好像都把 HDR 描述得很差,不過 HDR 當然有它的好處,在我寫這篇貼文的兩週前,Halide 背後的 Lux 團隊宣布了他們的 Halide Mark III 計劃,今年大改版的重點之一就是 HDR,另外兩個則是調色(color grading)與介面改版。
我的前一篇文章〈快速推薦 Bike Outliner〉寫得比較像是推薦給那些已經知道大綱軟體,或是還在找類似工具的人,但我想還是可以補充一下 Bike 帶給我的價值,並且提供幾個我使用的場景給大家參考。
思考的起點
Bike 為我帶來最大的價值是「可快速條列文字並組織架構」(同時保持心情愉快或穩定),因此對我而言最有用的場景是在 Mac 上「開始思考某件事情的時候」(很多時候則是紙筆)。因為它很適合寫清單,調整階層跟順序都很快(也很適合做所謂的 brain dump),快速地將腦中的想法傾倒出來,只要條列式,甚至簡短字句或單字都可以,寫完一件事就換行,或是要一直縮排也行,後續再來組織整理就好了。我在想題目、安排想讀的書,都會用 Bike 先快速列出來。
「快速記錄一些文字」有不少軟體都做得到,也做得很好,例如 Drafts(它還有 Apple Watch app 可以隨時語音轉文字)、Apple Notes 等等,要記待辦事項也有 Reminders 或 Things,但是在 Mac 上要調整順序跟階層(還有一些文字格式),Bike 操作起來就是比較順暢。另一個重要的特性就是大綱的展開/收合,能夠在寫文件的同時注意整體架構我想是很有幫助的。
以前要快速記錄事情我都用 Drafts,使用 Bike 後讓我更加意識到自己常用的 Markdown 格式/編輯器並不適合處理需要排序、階層、展開/收合的內容。或許有些軟體也具備上述的功能,不過如果還要是原生、本機端、file-based、scriptable 的 Mac app,反應還要快,應該就很少見了吧?(Drafts 跟 iA Writer 都有可以移動段落順序的功能,但就是不像 Bike 那樣可以「伸縮自如」。)
前一篇貼文提過 Bike 有聚焦功能,可以讓我在既有文件立刻進入一個獨立的、不受前後文干擾的思考空間,不必擔心弄亂原本的排版或內容。反過來說,如果我需要參照同一份文件其他位置的內容,Bike 也可以在多個新分頁或視窗開啟同一份文件,這對我編輯長篇文件、準備演講和簡報大綱來說都很有用。
大綱
既然是大綱軟體,當然很適合寫大綱。後來我在寫文章的時候就不是從 Drafts 開始了,而是先在 Bike 上發想,思考文章的目的、主題、大綱等等,覺得差不多了之後再移到 Drafts 開始寫稿,有需要的話就把 Bike 視窗並列在 Drafts 旁邊。(順帶一提,草稿寫到一定程度之後我就會一鍵移到 iA Writer 繼續完成。)
同樣地,既然適合寫文章的大綱,各種專案、策略、事物的架構,尤其是那種樹狀結構的,應該也都很適合。(雖說 Bike 的大綱每一點都有自己的連結,可以打破樹狀結構限制,但真的遇到需要圖像化思考的時候,我想也不必堅持繼續使用文字編輯器了。)
彈性
第三個就是 Bike 檔案格式和自動化的彈性,一來我不必擔心產出的文件只能在 Bike 使用,二來是結合 shell script、AppleScript、Keyboard Maestro 跟 macOS Shortcuts,不管是利用 Bike 本身的功能組合、擴充,或是把我在 Bike 寫的東西轉移到其他軟體,都很有幫助。
除了我在前一篇提到的「將任何新的 Bike 文件轉檔成 Markdown 文件在 iPhone 查看、編輯」,還有「把待辦事項傳送到 Things」,其他我常用的還有:
將目前游標所在位置的 row 在新視窗開啟並聚焦
收合目前游標所在位置以外的所有其他大綱內容
複製 Bike 內容,清理格式後貼到 Logseq
用快速鍵立刻打開一個新的 Bike 空白文件(macOS 全域的快速鍵,就算目前正在用別的 app 也能立刻開啟新的 Bike 視窗)
Jesse Grosjean 想到的解法是讓 Bike 文字游標出現在格式變化的交界處時會長出「尾巴」,這個設計讓使用者在編輯 rich text 時能夠清楚地掌握格式:在一段文字中插入文字游標時,可用鍵盤方向鍵控制「尾巴」指向左或右,代表接下來輸入的內容會套用哪一邊文字的格式。實際效果可參考下方兩張 GIF,也可以往下滑看 Jesse Grosjean 錄製的說明短片。
▲ 展示 Bike 文字游標設計的效果 1:文字游標指向左邊時, 新增的文字會套用原本游標左側文字的格式。▲ 展示 Bike 文字游標設計的效果 2:文字游標指向右邊時, 新增的文字會套用原本游標右側文字的格式。
動畫設計
一開始在 Bike 打字時,相信很多人會立刻注意到文字游標移動的模式「不太一樣」,那是因爲 Bike 針對游標移動的動畫做了巧妙的設計,在打字、移動游標(上下移動時特別明顯)或是調整大綱順序的時候覺得很滑順、流暢,令人感到心情愉快。(這點似乎每個人的感受不同,有些人反而會覺得變慢,不過動畫可以調整速度,也可以關掉。)
在新分頁或新視窗開啟同一份文件
另一個提升 Bike 使用體驗的功能是在新分頁或新視窗重複開啟同一份文件。這樣一來就可以同時看到文件不同位置的內容,或是在處理某個子項目的時候,同時透過另一個視窗看到最上層的整體大綱。我是在過去幾年使用 Roam Research、Logseq 等產品之後才體會到「重複開啟同一份文件以顯示不同位置的內容」這樣的設計有多麽便利。
輕巧、快速的原生 Mac app
Bike 是原生 Mac app,這點在今日已是一種少見的美德。Bike 程式體積輕巧、速度快,使用時佔用的記憶體也少。
前幾天發現裝在 Raspberry Pi 的 AdGuardHome 無法自動更新,不過因為之前有過一次按照文件說明自己手動更新的經驗,當時是從 Mac 以 VNC 方式操作 GUI + command line 完成,想說等假日有空再來走一次。
沒想到這次一開始就不太順利,VNC 竟然連不上,於是打開 Terminal 以 SSH 連線讓 Raspberry Pi 重新開機,之後雖然 VNC 可以連線,畫面卻是一片黑,只顯示「Cannot Currently Show the Desktop」訊息,我 google 後逐一排除原因,發現可能是 Micro SD 卡的空間滿了。這令我很困惑,因為這台機器除了跑 AdGuardHome 完全沒別的用途,怎麼會 32GB 的空間就用完了呢?
被超大 err 檔攻佔!
後來我在檔案系統裡一個一個查,很快就發現 var/log 裡有一個超級大的檔案「AdGuardHome.err」,一個檔案就佔了 22GB!雖然我也順便學了 scp 指令,想要把檔案搬出來,但中間因為很搞笑的原因一直沒成功,索性直接把檔案刪掉。重新開機之後,我又打開 AdGuard Home web app,想說再按一次自動更新看看,很神奇的這次就成功了 XD 結果繞了一大圈我解決的是別的問題,哈哈。(我查了一下,似乎自動更新會失敗不必然是因為空間不足,但因為我把 .err 給刪掉了,所以⋯⋯ XD)
為了避免下次又出現這種 22GB 的檔案,我學到可以用 logrotate 處理,而且我發現其實 Raspberry Pi OS 很多軟體都有設定 log rotation,不知為何 AdGuard Home 沒有這個設計。
前面提到說我使用 scp 指令過程很搞笑,就是因為我上傳了一張 Terminal 截圖,畫面是 ncdu 顯示檔案列表,我問 ChatGPT:「It’s my Raspberry Pi, how do I move the 22GB file out of it? (I can access it through SSH on my Mac.)」它說你可以用 scp 指令,接著給我 example code 並且附上詳細的解釋。以下是它提供的指令:
當我在 Mac 上「已經透過 SSH 連線 Raspberry Pi」的 Terminal 輸入那個指令後,我的 Mac 桌面毫無動靜,反倒是 VNC 視窗裡 Raspberry Pi 的桌面出現了那個檔案,相信真正懂的讀者早就看出問題在哪裡。我後來發現原來 google 有篇文章的教學寫著:
NOTE: This is done from the Mac Terminal window without being logged in to the Raspberry Pi over SSH. I am forever forgetting this and try doing it from an SSH session.
笑死,對吧?🤣事後想起來覺得 ChatGPT 並沒有發現我已經以 SSH 連線到 Raspberry Pi 了(不然我哪來的 ncdu 截圖呢?),這時它應該要建議我另外開啟一個 Termainl,在 Mac 這邊執行 scp 才對啊,或是修改成別的指令。又或者我在 google 的時候如果沒輸入 Raspberry Pi 或 Mac 等關鍵字,第一個結果「How to Use SCP Command to Securely Transfer Files | Linuxize」其實就會讓我知道可以輸入 source 跟 destination 的 IP。